Showing posts with label The Suburban Homestead Kitchen. Show all posts

Wednesday, September 18, 2013

Pickled beets and the Cadillac of canning jars!


If you are a canner, you share my awe and envy every time you see a Weck canning jar.  They are so beautiful!  They are made entirely of glass, including the lid, with a rubber gasket and two little metal clips to hold it in place while canning.  In early spring, I started buying just a few.  I would love to increase the amount I have, but they are not cheap!  I have been waiting and waiting to can up some beets in these glorious jars.  My husband is from Pennsylvania, and so is my dad so pickled beets is very much a part of our taste repertoire.  I think they make beets taste soooooooooo good.


For picture purposes, I stacked the jars, but you do not want to store your jars this way.  You shouldn't do this for most jars because if there is a problem with your canning and gases start accumulating in the jars, it will pop the lid off.  You want that to happen so that you know it is no longer good.   Anyways, here's a recipe I used. 

Pickled Beets:
7 lbs. beets
4 cups 5% vinegar
1 1/2 tsp pickling or canning salt
2 cups sugar
2 cups water
2 cinnamon sticks
12 whole cloves

Trim the beets (ends and stalks to about an inch) and wash.  Bring to a boil in a pan of water until they are tender, 25-30 min. Let beets cool and throw out the cooking liquid (you can let that cool and water a part of your garden with it).  Once cooled, cut up your beets.  I made mine into 1/4" slices, but I've seen people use dices as well.  I've also seen baby beets canned whole.  You decide! Combine the vinegar, sugar, salt, and the water.  Use a cheesecloth for the spices or a tea infuser ball and place in vinegar mixture.  Bring to a boil and then add the beets for five more minutes.  Remove the spice bag and start filling your jars, leaving 1/2" headspace.  Pints and quarts are process for 30 minutes at sea level.  Since I am at a high elevation, I had to process for 40 minutes.  This recipe makes approximately 8 pints.  

Now I had leftover pickling liquid.  Waste not, want not.  In Pennsylvania, there is this beautiful creation called "red beet eggs."  Once you are done with the beets, use your liquid to infuse hard boiled eggs.  Store in the fridge over night and try them the next day.  


This is the only picture I have because the family ate them all...very quickly!  I haven't looked into whether or not these can be canned.  ???  I swear I have seen them canned but that could be my over-40 mind playing tricks on me.  Let me know if you know this is a canning recipe as well.  ???  For safety's sake until we know for sure, keep them in your fridge until all is consumed!  I hope you enjoyed this post!  Blessings to you!  Enjoy your harvest and the work of your hands!


When life gives you hail, IMPROVISE!

You saw the damage. Not pretty.  This was my best year for tomatoes.  I lost four plants, two of which were massive!  They were magnificent.  But amazingly, the plants did their job and protected the tomatoes...everything was stripped except for the tomatoes.  I lost some, but I had 17 pounds of perfectly good green tomatoes.  What to do, what to do????  Usually it's in late fall when I have this problem and I just let the green tomatoes ripen inside.  I've been seeing so much on green tomatoes lately that I wanted to try some things.


Here's a sampling of some of my tomatoes.  They were just gorgeous.  I decided to make a green tomato salsa, picalilli (which is a green tomato relish), and also with some of my zucchini, I made mock pineapple.


It all turned out beautifully and the mock pineapple (zucchini) tastes just like pineapple!  We put it on some pizza.  It's awesome.  I found something else that I will no longer need to buy.  I rarely use pineapple so that's going to be a real treat!  I hope through life's storms you find the unexpected treasures!  Blessings to you!  Happy canning and harvesting!


Thursday, August 22, 2013

How to Make Homemade Mayo!


Posted by PicasaI finally broke down and tried my hand at this wonderful condiment.  With homegrown eggs, this is definitely the recipe to make.  I've had chickens for quite awhile so I am not sure why I haven't tried it yet. 

Here is a recipe I used:  
4 egg yolks
1 whole egg
2 cups 100% vegetable oil (or other neutral oil)
1 TBSP Dijon mustard
1/2 lemon, juiced
1 tsp salt
1/4 tsp sugar

Make sure everything is room temperature.  Get your eggs and using an immersion blender or regular blender, beat those eggs!!!  Once the eggs are completely mixed, add everything but the oil.  Now you are ready for the tricky part.  My eggs were tiny because they were from a newly laying flock so I had to judge when it was enough oil.  Believe it or not, I only needed 1 cup of oil because my eggs were so small. As your machine is whirring, drizzle SLOWLY with the oil.  I used an immersion blender and had an extra pair of hands helping me out. Incorporate the oil.  Researching this, you hear people say that their mayo broke.  That means everything starts to separate.  You don't want that because this is an emulsion...everybody needs to stick together!  How can you tell when you have enough oil?  You will see things start thickening up pretty quickly.  If you see oil start pooling on top and it won't incorporate into your emulsion very quickly, stop adding oil.  Your emulsion is full...try to get that last little bit of oil worked in, but do not add more.  Voila!!!  You have mayonnaise.  Smell it...taste it....it's pretty darn amazing!  Mine looks a bit yellow.  That's because I used dijon mustard.  If you research all the recipes, you could use vinegar and other ingredients...this just seemed pretty simple to me and the taste is spot on.  

I hope this helps anyone who has been scared to try their hand at this.  It really is quite easy and I know I will never have to buy mayo again!  Next blog post I will show you what I am doing with this mayo!  Have a great day, everyone!  Blessings!

Monday, December 17, 2012

Gingerbread Creations!!!

It's that time of year where we are entrenched in cookie dough and Christmas goodies.  I have finally found a great gingerbread recipe that holds up well and tastes great.  On this search, I have also encountered some fantastic cookie cutters that make life even more joyful around here!

I have searched high and low for this certain set of cookie cutters.  My name is Ginger; my nickname is Ginja the Ninja (hello, best nickname EVER!, hahahaha).  Anyways, there are these cookie cutters I have spied online, but I'm too cheap to pay for shipping, so I have been biding my time, waiting to find these little gems and BOOM, I was walking through Target one day and they were magically there.  I cried out in the store, "No way!" and bought a set on the spot.  May I introduce my Ginga the Ninjabread men cookies!!


Aren't they adorable????  But wait, there's more gingerbread madness.  Walking through said Target, I spied another cookie cutter next to my ninjas that had my creative cogs moving...hmmmm, what could I do with these.  Let me show you...


They are called "gingerdead men" which didn't seem very festive to me for Christmas (more for Halloween) so I figured a way to make these little guys funny.  Enter a handcrafted outlet and voila, I entitle it, "What happens to naughty gingerbread men."  I entered this picture in a contest on a blog I follow (Frills in the Hills) and I won a $95 Puremelt chocolate kit!  I couldn't believe it!  I don't win anything!  But this is how we do funny and festive at my house!!!

This last gingerbread configuration is one I have been doing for years.  I have a stoneware mold from Pampered Chef that I bought 14 years ago.  It's a train...you can do gingerbread in it, chocolate, regular cookie mix.  It's been a staple around here for a long time.


I hope you are having a wonderful time with your creations out of cookie dough!  I am sending you gingerbread dreams!!!!  The recipe follows if you're interested. Blessings to you and your family!

Here's the recipe I used:

3 cups flour
1 1/2 tsp baking powder
3/4 tsp baking soda
1/4 tsp salt
2 tsp ground ginger (this is mild; if you like it spicy, add 1 TBSP)
1 3/4 tsp cinnamon
1/4 tsp cloves
6 TBSP unsalted butter
3/4 cup brown sugar
1 egg
1/2 cup molasses
2 tsp vanilla

In a small bowl, mix the flour, baking powder, baking soda, salt, ginger, cinnamon and cloves.  Set aside.
In a large bowl, beat the butter, brown sugar, and egg on medium speed until it's well blended. Add your molasses and vanilla until well blended.  Gradually stir in dry ingredients until all is blended and smooth.  Divide the dough in half and wrap in plastic.  You can leave at room temp. for two hours, or do as I do and put it in the fridge for at least an hour.  Roll out your dough using two sheets of plastic wrap or wax paper. Flour your cookie cutters and cut out your shapes.  I bake my cookies on a cookie sheet with parchment for 7 - 10 minutes at 375 degrees.

Note: I actually mix my ingredients in my food processor.  It's fast and easy.  Just don't overwork it!


Monday, June 20, 2011

Canning on the Homestead

First Canning Session of the Year
What to do with all those radishes???


With the several pounds of radishes I have harvested, I had to figure out something to do with them.  Only my husband and youngest daughter really like them, so I decided to make some radish relish so I can preserve them so they will last.  The recipe I used is here.  I have a feeling my husband is really going to like it.  He tried it with all the raw ingredients and said it had good flavor.  I'm sure it will only get better as time goes on and it has time to mellow out.  It gets such a pretty pink and rosy color.  I made two batches and got about 10 half-pints of relish!


This is a nice recipe because you have to let the whole concoction sit for three hours so you have time to get all your jars ready or do other things.  Once that is done, you boil the ingredients for awhile and then jar them up and process (again, see recipe link).  I look forward to seeing how this will taste in a few weeks, but I can rest knowing that none of the radishes went to waste!  Plus, all the tops of the radishes were fed to the chickens.  They loved them and get so excited when they see me coming!  They have been so fun...hopefully, after this coming weekend, I can show you the finished coop!

I hope your gardens are growing beautifully!  Have you started canning anything???  Happy preserving and blessings!

Monday, June 13, 2011

Chicken and garden updates


Wow...time sure does fly when you're gardening! I've got a bunch of updates so I will start with the chickens.  Here's the progression of our coop.

The coop with our salvaged window from a neighbor.

Hubby working on the run and the door has been added on.


Chickens already using the run!


Hubby is still finishing up the coop.  He's got to put on the chicken wire on the back ventilation and he's finishing up the floor.  The chickens are seven weeks old so they really needed some sunshine.  They stayed in the run all night and since it's warm, they have fared very well.  I couldn't sleep because I was so worried about a fox getting his paws/claws through the chicken wire...tonight we'll have them locked up in the coop!  I really need some sleep, haha!  The only supplies we bought for this coop are the screws and hinges, the chicken wire, shingles for the roof (I bet I could have found these but we really needed them now) and the paint (hello, $5 oops paint at Home Depot that normally runs over $37 for one gallon--who can afford that???)  My husband did a great job and we need to put up the trim and finish painting.  I can't wait until it's finished.

The garden is coming along well!  I've had my battles though.  Flea beetles are now prevalent in my backyard and they love the radishes!!!  I think I will continue to sow radishes so that the flea beetles will only bother them...a trap crop.  This is the first year I've grown radishes and they have turned out beautiful (minus the holey leaves!). 


They truly are the jewels of the garden and are so lovely to photograph!


The greens are coming on strong as well.  We had our first garden salad last night with the radishes.  My spinach has turned out really nice this year.  I've kept them spaced properly and they have just flourished.


I am up against the insects, though.  The ants have gone crazy and now I have the flea beetles.  It's an ongoing struggle, and I've found aphids, too.  I've spied a few ladybugs so between me squishing and the ladybugs devouring, we may stay on top of things.  Here's one last shot of the garden from an "aerial" perspective.  This is taken from my bedroom window.


I've laid down hay as a mulch between the boxes.  I'm not quite sure how I feel about it yet, but I consider it the cheap man's pathway.  I would love to put flagstone or brick or pavers down, but that's not in the budget any time soon, so we'll see how this works for me.  It gets quite windy sometimes so we'll see if the hay is still there in a few weeks.  I hope your gardening and homesteading is going well.  Let me know how your garden grows and happy homesteading!  Blessings!


Friday, March 18, 2011

Stretching the Food Budget Friday

Fast Food at My House

Are you ever in a pinch and need to make something fast without having to go to a fast food joint???  With four kids and many different schedules, my instinct is to get something quick.  However, the budget is too thin to be going out all the time.  Another problem I have is that I make everything from scratch and sometimes meals take a while to put together.  Things are frozen in bulk and time is of the essence.

So, what do I do?  Well, a little planning never hurt anyone!  Add a bit of creativity and you have yourself a meal!  One of my easy go-to quick meals is bread pizza.  I got a nice loaf of sourdough bread on the clearance rack.  I use my homemade sauce and top with cheese and I throw it in the oven for a few minutes and boom, quick meal with great results. 


I also made a second batch in which I put some leftover sausage.  I have a stash of cut-up green peppers in the freezer which I bought on sale during the summer for such a time as this.  A little bit of pepper goes a long way!  I added the cheese and crushed red peppers and my husband was very happy with it!!!  He eats late at night due to his work shift so this is also a quick dish to reheat. 


This also is a super-cheap meal idea...we have been in a bind lately financially so this was quite delicious and very affordable.  Who doesn't like pizza?

Hope you have a great week...we are going into Spring Break now, hallelujah!!!!  We have lots of cleaning to do and fun projects.  Lots of posts to come!  Blessings to you!

Friday, January 14, 2011

Stretching the Food Budget Friday

What to do with 12 ounces of pecans??? Part 1


Stretching the food budget:  this is a skill that can net you big gains in the finance department. As a homemaker, I've had to make magic with what I have on hand.  I can make a vat of chicken noodle soup with two chicken breasts or make a few pounds of hamburger last a couple of weeks.  For our family of six, this skill is a necessity.

Coming out of the holidays, do you splurge on a few extras to make special recipes?  I do. I get all giddy when I see all those displays of nuts during the holidays because there are so many recipes that use them.  However, they are expensive.  So I bought 12 ounces of pecans for $5.99.  I had considered making a pecan pie for Christmas, but that would have taken most of the pecans and I wanted it for many other recipes.  Here is a recipe that will take something ordinary like apple pie and launch it into extraordinary with a twist using pecans.  I found the recipe while cruising through the grocery store.  They always have little free pamphlets put out by companies full of recipes using their products.  I found one by Pillsbury and it's called Topsy Turvy Apple Pie.  I'm not going to give you the apple pie recipe...use your own favorite recipe for this because we all have one, LOL!  What makes this pie amazing is this...before you assemble your pie in the pie pan, mix together the following ingredients at the bottom:  1/4 cup firmly packed brown sugar, 1 TBSP. margarine or butter, melted, 1 TBSP. corn syrup, and then arrange 1/4 cup pecan halves in the mixture to make a nice design.


Now assemble your pie as if there was nothing on the bottom of the pie pan.  Here's how my pie looked before baking.


Here it is after baking.  Notice I didn't go crazy making the crust look perfect...there's a reason for that.


Immediately run a knife around the edge of the pie pan and carefully with all the skill you can muster, turn the whole thing upside down onto a platter or cake stand.  I know...it goes against everything within you...but look at the result!


This is why it's not important what your "top crust" looks like.  It will be the bottom crust.  This pie was absolutely delicious because of the pecans and the unusual twist on an old-fashioned recipe.  I hope you try it sometime and enjoy!!!  It is absolutely delicious!  It's a great recipe that with the use of pecans, takes it to a whole other level.  Only 1/4 cup of pecans were used, so we still have plenty of pecans left for many other recipes.  Blessings to you and enjoy the nuts in your life, hahaha!


Thursday, December 30, 2010

Our Gingerbread Parthenon!

Yes, we are homeschoolers and what better way to celebrate some of the fun things about Christmas than to combine history with the holidays!!!  Here was our gingerbread Parthenon.  I had sworn off gingerbread for many years, but I finally found a great recipe.  Now I need to perfect royal icing.  I used powdered meringue, but the icing seized up on me so it was hard to work with.  Nonetheless, it gave our Parthenon a more authentic look (hey, you gotta look at the silver lining!).  Has anyone built anything unusual out of gingerbread?  How about some hints about icing???  I really need to take some time working on that!!!


My goal was to pipe on the column design with the icing, but grand plans usually don't work out.  Oh well, we shall try something different next year!

Monday, October 11, 2010

Strawberry Jam and Bargain Kitchen Essentials


I had the wonderful opportunity to go to a private greenhouse and glean from their strawberry beds.  I came home with 25 lbs. of ripe strawberries!!!  My goodness!  I definitely had my work cut out for me because I had to attend to them right away.  I turned it all into jam because my family could not live without the sweet stuff and after many, many hours of work, I've got enough to last well into next year.  I may even have the chance to go pick more!!!  I ended up with 24 full pints and 6 half-pints!!! I am really happy with my jam stash now!! 


I've been doing a lot of thrift store hunting lately and have found some real gems!  It seems that I've been in a real stainless steel kind of a mood lately.  Our local thrift store has offered $10 off for a $10 purchase coupon per email so our family has cashed these in and I have found some "steals."  First on the list is what I call my baby stockpot.  In the picture on the right is my huge stainless steel stockpot I bought over 10 years ago at Dillard's (I think) for half-price which was $18.  It still looks practically brand new even though it's a work horse around here.  I can cook 20 pounds of potatoes, it holds 25 pounds of strawberries (that's right, I took it strawberry picking), plus I can make stock in it from a huge turkey carcass!  The one on the left is the one from the thrift store.  The first thing that came to mind when I saw it was JAM!  It's the perfect size to make a batch of jam!  It has high sides so the jam can sputter away without making me a mess!  Can you say $1.99???!!!  Oh yes, I've already used it to process all those strawberries into jam (in separate batches, of course).


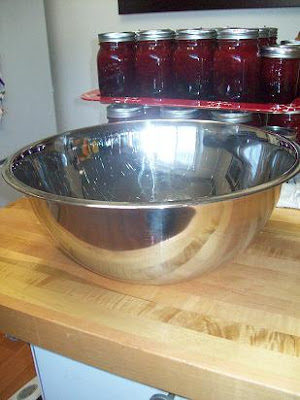
My next bargain was this ginormous stainless steel mixing bowl.  I had one years ago that I had sent with my husband to a church function I couldn't attend and he obviously never made it back home with it.  I just never had the heart to spend $16-$20 on one and finally found one for $3.99!  I absolutely love it! 


My next acquisition were these Wearever AirBake cookie sheets.  I figured I was taking a gamble on these because I couldn't figure why anyone would want to get rid of them unless they weren't any good.  After a minimum amount of cleaning, we baked some cookies on them and they are great!  Can you imagine how many cookies I can bake now at once!!!?  The big one is 15" x 20" and the smaller one is roughly 14" x 16 1/2".  They were only $2.99 each.  Remember, I had my coupons so I basically got all these things for FREE!!!  These cookie sheets are totally expensive brand new...I think the big one goes for $20. 


And finally, who couldn't use a few more gravy boats.  These awesome stainless steel gravy boats were priced at $1.59 and $0.99.  I think I am so ready for the holidays now!!!


I hope all of you are finding wonderful bargains and I would love to hear all your stories of what you're preserving on your homesteads.  I have much more to come in the next few days as we are on fall break...
Blessings to you on your homesteads!

Saturday, October 2, 2010

Quick and thrifty fall treat...Caramel Apples

I'm getting ready to do a huge batch of canning because I have at least 40 pounds of apples.  That number is dwindling because they're just sooooo good to eat.  So, with all the work ahead of us, we thought we would make a delicious treat of caramel apples.


We took the easy way out and bought two bags of caramels that are individually wrapped.  The bag comes with 5 sticks each for your apples.  Each bag takes one tablespoon of milk and you zap it in the microwave for 2 1/2 minutes.  We coated our apples with the caramel then put chopped peanuts on the still warm and sticky caramel.  We let it set in the fridge for 5-10 minutes and then melted chocolate chips in the microwave and adorned our apples with slashes of chocolate.  We used Gala apples which are delicious as is, but when you add all this gooey goodness, MERCY!!!!!  For the price of one apple in a specialty chocolate shop, we got ten!!!  That is what I call bang for your buck.  When I was pregnant with my last child, caramel apples were all I craved.  I  haven't made these in a long time, which I'm not sure why, but they really are a great treat for the fall.  The kids are in apple-caramel-chocolate heaven!

 
Time to get my preserving done...till next time...Enjoy your fall treats!!!

Tuesday, July 20, 2010

Seasoning Cast Iron

We will be going on our very first camping trip as a family.  Many years ago, my husband worked for a sporting goods store that got bought out by another sporting goods store.  So they were getting rid of all the old inventory to make room for the new.  Everything was marked down, plus my husband had his employee discount, so we got a tent, 2 cast iron dutch ovens, and a cast iron skillet for a song!!!  Now it's time for us to use it! I haven't used the dutch ovens so I needed to season them.  Here are the step-by-step instructions that the cast iron manufacturer provided.
  1. Wash new cookware with hot, soapy water and a stiff brush.  Rinse and dry completely.
  2. Apply a thin coat of vegetable oil or melted vegetable shortening to the entire surface (including lid if applicable), both inside and out.
  3. Line the lower oven rack with aluminum foil, and preheat your oven to 350 degrees F.  Place the cookware upside down on the upper oven rack.  The aluminum foil will catch any drippings.
  4. Bake the cookware for one hour, then turn off the oven and let the cookware cool before removing.
  5. Store uncovered in a dry place.
  6. After use, clean using a stiff brush and hot water only.  Towel dry immediately and apply a light coating of vegetable oil to cookware while still warm.
I used melted shortening. Here's what the cast iron looks like after being newly seasoned.  The one on the right is straight out of the box and is exactly what it looks like when you start.  The one on the left is how it will look after being seasoned for the first time.  With much more use, they will turn darker and darker.


  Now I've got to learn how to cook with it!!!  I've got a few recipes and I'm going to try dump cake so we'll see how it all turns out.  I'll keep you posted on the camping trip when we get back!
Happy camping and happy cooking!